
下载掌阅APP,畅读海量书库
立即打开


使用Spring Boot进行开发后,你就会发现原来一切可以那么简单,因为它开箱即用。不过在入门阶段我们暂时不需要讨论太多的细节问题,这是未来需要讨论的,这里只是让大家体验Spring Boot的开发是多么简单。首先,我们在IDE中创建一个Maven项目,定义其名称为chapter1,这样就可以看到一个Maven配置文件pom.xml,对其内容进行代码清单1-1所示的修改。
<?xml version="1.0" encoding="UTF-8"?>
<project xmlns=http://maven.apache.org/POM/4.0.0
xmlns:xsi="http://www.w3.org/2001/XMLSchema-instance"
       xsi:schemaLocation="http://maven.apache.org/POM/4.0.0
https://maven.apache.org/xsd/maven-4.0.0.xsd">
   <modelVersion>4.0.0</modelVersion>
   <parent>
      <groupId>org.springframework.boot</groupId>
      <artifactId>spring-boot-starter-parent</artifactId>
      <version>3.0.12</version>
      <relativePath/> <!-- lookup parent from repository -->
   </parent>
   <groupId>springboot3</groupId>
   <artifactId>chapter1</artifactId>
   <version>0.0.1-SNAPSHOT</version>
   <name>chapter1</name>
   <description>chapter1</description>
   <properties>
      <java.version>17</java.version>
   </properties>
   <dependencies>
      <dependency>
         <groupId>org.springframework.boot</groupId>
         <artifactId>spring-boot-starter-thymeleaf</artifactId>
      </dependency>
      <dependency>
         <groupId>org.springframework.boot</groupId>
         <artifactId>spring-boot-starter-web</artifactId>
      </dependency>

      <dependency>
         <groupId>org.springframework.boot</groupId>
         <artifactId>spring-boot-starter-test</artifactId>
         <scope>test</scope>
      </dependency>
   </dependencies>

   <build>
      <plugins>
         <plugin>
            <groupId>org.springframework.boot</groupId>
            <artifactId>spring-boot-maven-plugin</artifactId>
         </plugin>
      </plugins>
   </build>

</project>
从加粗的代码中可以看到,Maven的配置文件引入了多个Spring Boot的starter,Spring Boot会根据Maven配置的starter来寻找对应的依赖,将对应的jar包加载到项目中,spring-boot-starter-web还会捆绑内嵌的Tomcat服务器,并将它加载到项目中,这些都不需要开发者再进行处理。正如Spring Boot承诺的那样,绑定服务器,并且采用“约定优于配置”的原则,尽可能配置好Spring。这里只需要开发一个类就可以运行Spring Boot的应用了,为此新建类Chapter1Main,如代码清单1-2所示。
package com.learn.chapter1.main;

import java.util.HashMap;
import java.util.Map;

import org.springframework.boot.SpringApplication;
import org.springframework.boot.autoconfigure.SpringBootApplication;
import org.springframework.stereotype.Controller;
import org.springframework.web.bind.annotation.RequestMapping;
import org.springframework.web.bind.annotation.ResponseBody;

// Spring MVC控制器
@Controller
// 启用Spring Boot自动装配
@SpringBootApplication
public class Chapter1Main {
   @RequestMapping("/test")
   @ResponseBody
   public Map<String, String> test() {
      var map = new HashMap<String, String>();
      map.put("key", "value");
      return map;
   }

   public static void main(String[] args) throws Exception {
      SpringApplication.run(Chapter1Main.class, args);
   }
}
好了,这个入门实例已经完结了。如果你没有接触过Spring Boot,那么你会十分惊讶,这样就配置完成Spring MVC的内容了吗?我可以回答你:“是的,已经完成了,现在你完全可以使用Java Application的形式来运行类Chapter1Main了。”下面是Spring Boot的运行日志:
  .   ____        _         __ _ _
 /\\ / ___'_ __ _ _(_)_ __  __ _ \ \ \ \
( ( )\___ | '_ | '_| | '_ \/ _` | \ \ \ \
 \\/  ___)| |_)| | | | | || (_| |  ) ) ) )
  '  |____| .__|_| |_|_| |_\__, | / / / /
 =========|_|==============|___/=/_/_/_/
 :: Spring Boot ::             (v3.0.12)

2022-11-26T10:02:04.942+08:00  INFO 15448 --- [         main]
com.learn.chapter1.main.Chapter1Main    : Starting Chapter1Main using Java 18.0.1 with
PID 15448 (F:\spring boot 3\chapter1\target\classes started by ASUS in F:\spring boot
3\chapter1)
2022-11-26T10:02:04.944+08:00  INFO 15448 --- [         main]
com.learn.chapter1.main.Chapter1Main    : No active profile set, falling back to 1 default
profile: "default"
2022-11-26T10:02:05.777+08:00  INFO 15448 --- [         main]
o.s.b.w.embedded.tomcat.TomcatWebServer  : Tomcat initialized with port(s): 8080 (http)
2022-11-26T10:02:05.790+08:00  INFO 15448 --- [         main]
o.apache.catalina.core.StandardService   : Starting service [Tomcat]
2022-11-26T10:02:05.790+08:00  INFO 15448 --- [         main]
o.apache.catalina.core.StandardEngine   : Starting Servlet engine: [Apache
Tomcat/10.1.1]
2022-11-26T10:02:05.878+08:00  INFO 15448 --- [         main]
o.a.c.c.C.[Tomcat].[localhost].[/]      : Initializing Spring embedded
WebApplicationContext
2022-11-26T10:02:05.880+08:00  INFO 15448 --- [         main]
w.s.c.ServletWebServerApplicationContext : Root WebApplicationContext: initialization
completed in 890 ms
2022-11-26T10:02:06.159+08:00  WARN 15448 --- [         main]
ion$DefaultTemplateResolverConfiguration : Cannot find template location:
classpath:/templates/ (please add some templates, check your Thymeleaf configuration, or
set spring.thymeleaf.check-template-location=false)
2022-11-26T10:02:06.225+08:00  INFO 15448 --- [         main]
o.s.b.w.embedded.tomcat.TomcatWebServer  : Tomcat started on port(s): 8080 (http) with
context path ''
2022-11-26T10:02:06.233+08:00  INFO 15448 --- [         main]
com.learn.chapter1.main.Chapter1Main    : Started Chapter1Main in 1.625 seconds
(process running for 1.938)
从运行日志中可以看到,Tomcat服务器已经启动,因此,接下来就可以进行测试了。打开浏览器,在地址栏输入http://localhost:8080/test,可以看到图1-1所示的结果。
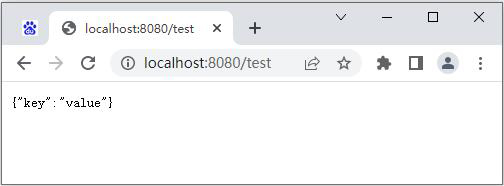
图1-1 Spring Boot运行结果
这与传统的Spring应用开发是不是很不一样呢?从上面的开发过程可以看出,Spring Boot允许开箱即用,这就是它的优势。传统Spring开发需要的配置,Spring Boot都进行了约定,也就是开发者可以直接以Spring Boot约定的方式开发和运行你的项目。当开发者需要修改配置的时候,Spring Boot也提供了很多配置项给开发者进行自定义,正如它承诺的那样,尽可能地配置好Spring项目和绑定内置服务器,使得开发者需要做的内容尽可能地减少,开箱就能直接开发项目。对于部署和测试,Spring Boot也提供了默认的配置,使得部署和测试的工作更容易进行。Spring Boot还提供了监控的功能,让我们能查看应用的健康情况。
随着云时代的到来,微服务架构
 成为市场的热点。为了支持微服务的开发,Pivotal团队构建了Spring Cloud来实现微服务架构。Spring Cloud的架构涉及很多实现微服务架构所需的组件,如服务治理中心、负载均衡、网关和断路器等。Spring Cloud并不会局限于自己开发实施微服务架构所需的组件,而更多的是采取“拿来主义”,将那些通过长时间和大量实践证明实用的组件通过Spring Boot进行封装并发布,供开发者使用,可见学习Spring Cloud的基础就是Spring Boot。有些开发者还会将来自同一个企业的多个组件通过Spring Boot封装起来,整合形成套件并发布,例如国内流行的Spring Cloud Alibaba套件、国外流行的微软公司交由VMWare托管的Spring Cloud Azure套件和美国奈飞(NetFlix)公司的Spring Cloud Netflix套件等。